English

Set Up Usenet on Synology NAS for Direct Access

Set Up Usenet on Synology NAS for Direct Access

Configure Usenet on your Synology NAS

Synology NAS devices excel in data storage and management. They’re perfect for creating automated backups and hosting media servers.  DSM, the intuitive operating system for Synology devices, simplifies these tasks.

While DSM offers built-in backup solutions, what if you want to directly access Usenet on your NAS, eliminating the need for manual article transfers?

This guide demonstrates how to effortlessly set up Usenet to store data directly onto your Synology NAS.

Requirements

  • Newsreader: Since native newsreaders aren’t available on DSM, Container Manager is necessary.

What is Container Manager?

Container Manager, a 
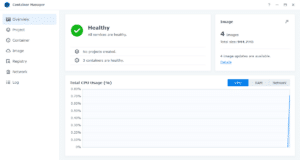
recent addition to DSM (replacing Docker), allows you to run programs incompatible with the NAS’s operating system within a “container.”

You can search the Container Manager registry for the desired program, download it, configure it, and access it through a browser window using a designated port.

Main Screen of Container Manager

What is a Container?

A container manager is a system or tool designed to facilitate the creation, deployment, management, and scaling of containers. Containers, in the context of computing, are lightweight, portable, encapsulated environments that provide a way to package applications and their dependencies together. This packaging allows applications to run reliably and consistently across different computing environments. Container managers automate various aspects of container lifecycle management, offering features such as:

  • Provisioning and Deployment – Automating the process of provisioning containers on host systems and deploying applications within containers.
  • Orchestration – Coordinating how multiple containers interact, communicate, and connect with each other across different hosts, managing the networking between containers, and ensuring they work together as intended.
  • Scaling – Dynamically adjusting the number of containers to match the demand for the applications they host, scaling services up or down as needed.
  • Load Balancing – Distributing traffic and requests efficiently across multiple containers to ensure optimal resource utilization and response times.
  • Health Monitoring – Keeping track of the health and performance of containers, restarting failed containers, and providing alerts on issues.
  • Security Management –  Managing access control, applying security policies, and ensuring containers are updated and secure.

Some popular container managers and orchestration tools include Kubernetes, Docker Swarm, and Apache Mesos. Kubernetes, in particular, has become the de facto standard for container orchestration, offering robust features for managing complex, distributed containerized applications across various environments.

Compatible Newsreaders

While not all newsreaders have compatible images in the registry, popular options like SABnzbd and NZBGet are available.

Setting Up Usenet

Install Container Manager

  1. Access the DSM Package Center.
  2. Click “All Packages” from the menu on the left.
  3. Search for “Container Manager,” choose it, and click “Install.”
Screen on how to install Container Manager from Synology Package Center

Launch Container Manager

  1. Open Container Manager and select “Registry” from the menu on the left.
  2. Search for your preferred newsreader (e.g., SABnzbd).
Instructions on how to install SABnzbd in Container Manager

Download and Run the Image

  1. Choose an image and click “Download.”
  2. Click “Image” from the menu on the left.
  3. Select your downloaded newsreader image and click “Run.” This will launch a setup wizard.

Configuration

  1. You can modify the container name (optional). We recommend enabling “Auto-restart” for the container to self-recover in case of crashes. Click “Next.”
First screen when you run an image in Container Manager.
  1. On the next screen:
    • Leave “Port Settings” as-is. But make note of the default port.

Volume Settings

      • Click “Add Folder.”
      • Select the “configs” folder and click “Select.”
      • In the field next to the new “/configs” icon, enter “/configs.”
      • Repeat “Add Folder,” navigate to your downloads folder, click “Select,” and in the new downloads folder field, enter “/downloads.”
      • Follow these steps for any additional folders you want the newsreader to access. The folder you select is the actual folder, while the field entry defines how it appears within the newsreader.

Environment

    1. Scroll down and click “+ Add” three times.
    2. In the first three left-hand side fields, enter “PUID,” “PGID,” and “TZ” respectively.
      • Find PUID and PGID
        1. Open a Windows Command Prompt window.
        2. Type “ssh” (without quotes) followed by [your NAS username]@[your NAS IP address] then press enter.
        3. Type in your NAS password.
        4. Type “id” (without quotes). This will show your uid and gid, which is your PUID and PGID, respectively.
      • Find TZ
        1. “TZ” stands for “time zone.”
        2. Go to this page and choose the TZ identifier that most closely matches your local time zone.
        3. Enter that TZ identifier into the TZ field.
Highlighted portion of container installation drawing attention to PGID, PUID, and TZ fields.

Finish

  1. Click the “Next” button and review the configuration. If all is good, check the “Run this container after the wizard is finished” checkbox, then click “Done.”
  2. Open a new tab and input the IP address of your Synology NAS, followed by a colon (:) and the default port you noted above (no spaces between the IP, colon, and port number). That will open your newsreader in that tab.
Picture of Top10Usenet

Top10Usenet

Top10Usenet is dedicated to bringing you reviews of Usenet services.