
How to Get Started with Usenet
(2025 Beginner’s Guide)
Usenet gives you fast, private access to over 120,000 newsgroups and decades of archived discussions. But getting started can feel a bit overwhelming if you’re unfamiliar with how it works.
This guide walks you through each step: choosing a Usenet provider, selecting an NZB indexer, installing a newsreader, and connecting them all. We’ll also cover how to quickly automate everything using Sonarr and Radarr.
Step 1: Choose a Usenet Provider
A Usenet provider gives you access to Usenet. It’s like your subscription to the Usenet network.
What to look for:
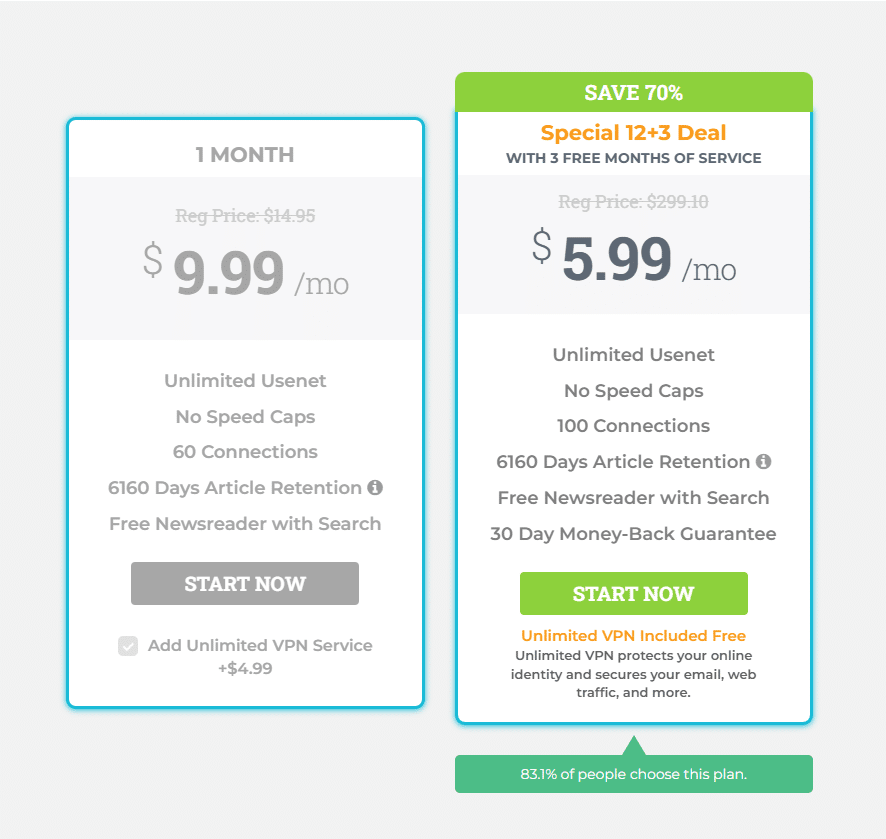
- Long article retention (e.g. 6,100+ days)
- Strong completion rates (no missing articles)
- SSL encryption for privacy
- Optional VPN included
Example Providers:
- Newshosting
- UsenetServer
- Eweka
- Easynews (includes its own built-in search and newsreader)
Once you sign up, your provider will give you:
- Server address
- Port number(s)
- Username & password
Save this information. You’ll need it when setting up your newsreader.
Need help choosing a provider? Visit our Best Usenet Provider Guide.
Step 2: Choose an NZB Indexer


NZB indexers work like search engines for Usenet. They help you find specific articles and generate NZB files (pointers) that your newsreader can use to locate and retrieve them.
What to look for:
- Open registration or invite access
- Good retention and search filters
- API access for automation (optional)
Example Indexers:
- NZBGeek (open registration)
- NZBCat (invite only, great automation)
- NZBKing (free, raw search)
- SquareEyed (clean design)
Create an account and copy your API key if your indexer offers one. You’ll need it for tools like Sonarr or Radarr.
👉Need help picking an NZB indexer? Visit our NZB Indexer guide.
Step 3: Install a Newsreader
A newsreader is the app that connects to your Usenet provider, downloads the articles referenced in your NZB files, and can repair and extract them.
What to look for:
- SSL connection support
- Support for multiple connections
- Optional NZB import or built-in search
Example Newsreaders:
- NZBGet (lightweight, efficient)
- SABnzbd (browser-based, user-friendly)
- Newshosting Newsreader (pre-configured with a Newshosting Usenet access account)
Set up your newsreader with:
- Your Usenet provider’s server info
- Your login credentials
- Number of connections (10–20 recommended to start with)
Now test your connection—it should say “Success” or “Connected.”
👉 Not sure which newsreader is right for you? Check out our newsreader reviews section.
Step 4: Connect Everything
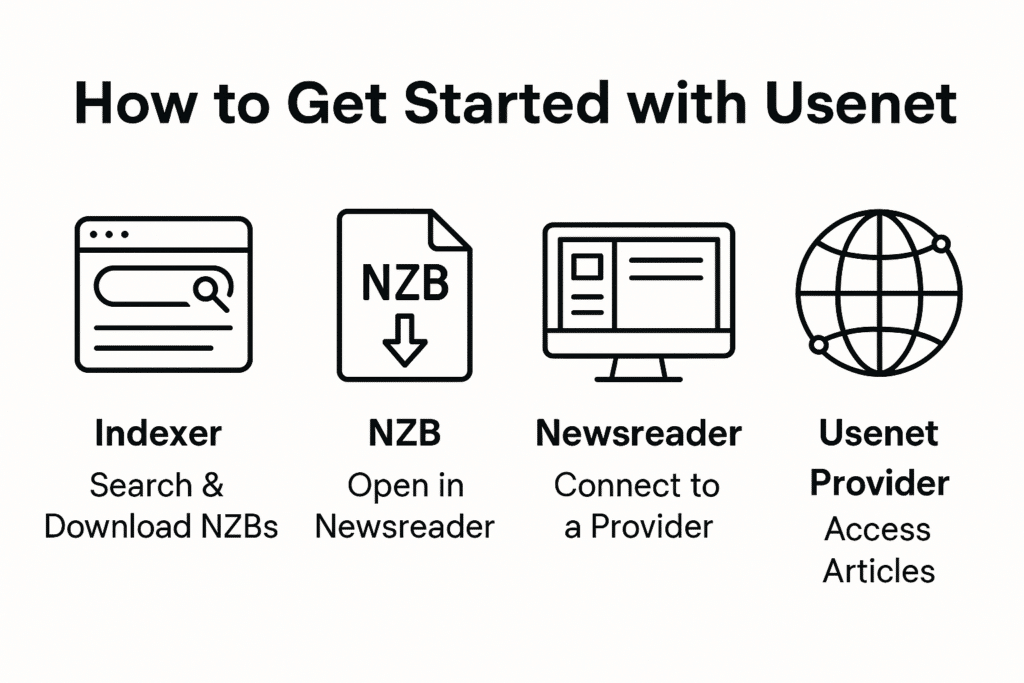
Once you’ve set up your provider, indexer, and newsreader, it’s time to bring them together. Here’s how the process works:
- Use your NZB indexer to search for an article.
- Download the NZB file.
- Open the NZB file in your newsreader.
- Your newsreader will connect to your Usenet provider and start downloading the articles.
That’s it! You now have a working Usenet setup.
Bonus: Advanced Automation with Sonarr & Radarr
If you want a hands-off setup that automatically grabs posts, you can automate everything with tools like Sonarr and Radarr.
What You’ll Need:
- A Usenet provider (from Step 1)
- An indexer that supports API keys, like NZBGeek or NZBCat (from Step 2)
- A newsreader like SABnzbd or NZBGet (from Step 3)
- Sonarr and/or Radarr installed
How It Works:
Sonarr and Radarr use your indexer’s API to search Usenet automatically. When a post matches your criteria, they’ll grab the NZB and send it to your newsreader for download. It’s a convenient, hands-off system. Rather than manually checking your indexer every time you want to look for something, you just set your preferences in Sonarr or Radarr once. From there, they continuously monitor Usenet and retrieve matching articles as soon as they’re available.
Setup Steps:
- In Sonarr/Radarr:
- Go to Settings > Indexers
- Add your NZB indexer URL + API key
- Add your download client:
- Settings > Download Clients
- Add NZBGet or SABnzbd with your download client’s host info and credentials
- Set up your folders:
- Choose where completed items should go
- Optional: Enable rename and sorting
- Set up your search queries
- Click ‘Add’
- Set quality profiles and monitoring options
That’s it! Sonarr/Radarr will now scan for new posts and automate everything for you.
You’re All Set!
Whether you prefer a manual approach or a fully automated media server, Usenet offers a fast, private, and powerful solution. Now that your system is in place, you can enjoy access to decades of articles with just a few clicks, or let your tools handle everything in the background.
👉 Need more help?
✅ Longest Retention
Access more NZBs
✅ Highest Completion
Fewer failed downloads
✅ Tier-1 Backbone
Fastest speeds and top reliability